Putty allows Windows users to connect to remote systems over the Internet via Telnet and SSH.
SSH- Stands for Secure Shell.
Putty is nothing but acts a connection media which is very secure to connect to remote computer.
Technically, Putty should be written as “PuTTY” (it’s a geeky pun).
How do I decide between SSH and Telnet?
Putty lets you make your connection using either SSH protocol or Telnet protocol. From your computer, these connections look identical, but because SSH uses an encrypted connection that is more secure than Telnet, we recommend that you always use an SSH connection when connecting to a computer system that supports SSH.
Where do I get Putty?
You can download it directly from www.chiark.greenend.org.uk/~sgtatham/putty.Some homework for you:
please installed the putty.exe as you installed mane software in you computer.
Thanks for shorten my blog.
Now I have installed the puTTY but how do I access it?
- Double-click on the Putty icon on your desktop, or go to Start->Programs->Putty.

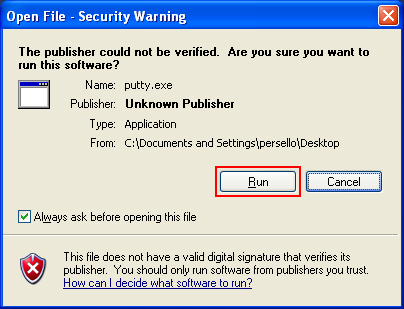
- If a box appears asking if you want to run putty, select Run.
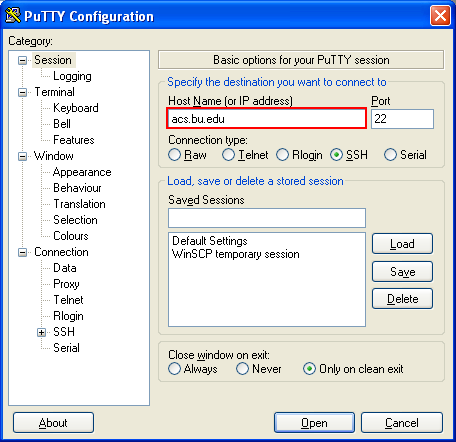
- When a PuTTY Configuration window opens select Session (it should be selected by default) from the Category panel on the left. In the Host Name (or IP address) field enter the name of the computer you wish to connect to. In the Port field replace 22 (the default) with 31415. Make sure that SSH is selected under Protocol (it should be selected by default). Click on Open.

- 1. for example
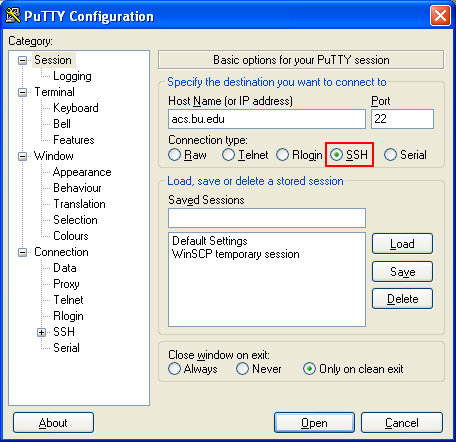
- Ensure that the SSH button is selected.
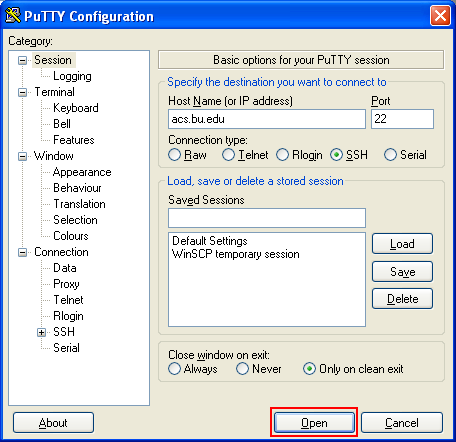
- Select the Open button.
- Enter you username and password on the below tow black boxes and ready for the magic. The PuTTY terminal will now appear. Enter in your BU login name.
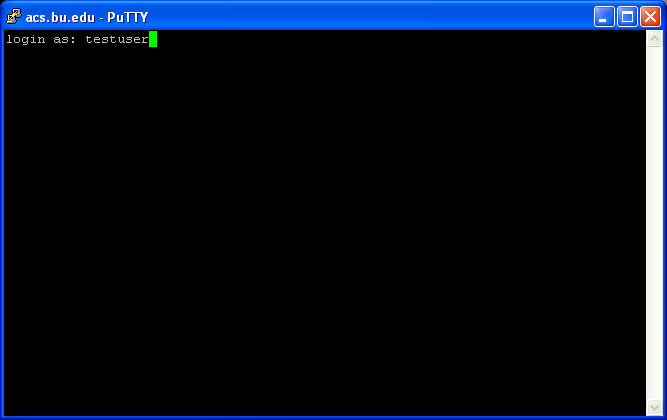
- Now, enter you Kerberos password.
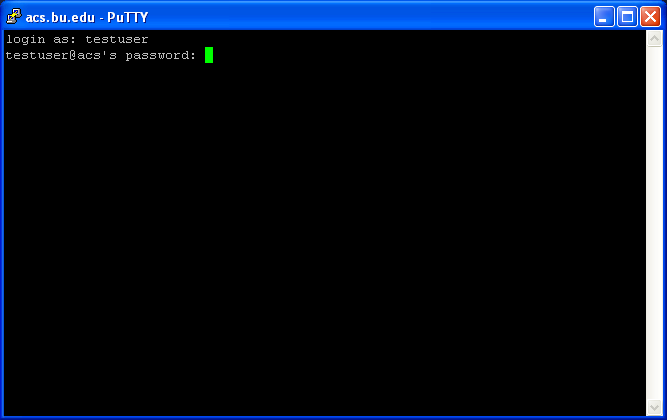
- Once you have give the Username and password, you are connected to the Remote computer. For example here: You have now accessed your ACS account using PuTTY. If you see some sessions already listed in the lower part of the Putty configuration window, then you have a pre-configured version of PUTTY or you have previously saved some sessions. Simply click on one of the acs#.bu.edu sessions to connect to ACS. In the example below, we chose acs4.bu.edu. Then click the Load button.
- You will see that the host name and protocol have now been filled in for you. Note that the protocol chosen is SSH, which we recommend for any system that supports it. You could make some settings changes in the left panel if you wanted, but for now, just click Open.
- If this is the first time you have connected to this host from your computer, you may see a message like the one below. If you are connecting to one of the ACS computers, you can be fairly confident that nothing fishy is going on, so click Yes. If you are connecting to an unknown computer, use your best judgment.
- You will now see a prompt that says “Login as”. Login as you did in steps 6 and 7 above.
- If your login name and password are correct, you will now be logged in. If you are logging on to ACS, you should now see a message that says “Welcome to the ACS Cluster”. You may be prompted to read messages, and you can answer y for yes, n for no or q to quit.


What if I want to make changes to Putty’s configuration?
Perhaps you don’t like the font size that Putty is using, or some other aspect of its configuration. When you have loaded a session but have not opened it (so you are between Step 2 and Step 3 above), just click on a category on the left side of the screen and make the change on the right side of the screen.For example, to make a change in the font size you’d go to the left side of the screen and click on Appearance, then click on the Change button on the right and make your font size change.

After you have made your change, click back on Session, at the top of the left panel. You can now click on the Save button if you want to make the change permanent. Then continue to open your session as usual.
Where are the menus?
After you open a Putty terminal session, there are no menus at the top of your screen. To get a menu, right-click (click with your right mouse button) on the session’s title bar, as below. You will get a pop-up menu and can choose the command you want. You’ll see that there is a Change Settings button here, too, so that’s another way to change settings such as font size.
Strange things happen when I right-click – why?
As we saw above, you can right-click on the title bar to get a menu. If you right-click anywhere else in your window, text may appear your screen. That’s because Putty lets you use your left and right mouse buttons as shortcuts for copying and pasting text. If you use your left mouse button to drag over (highlight) any text in your Putty window, that text is automatically copied to the Windows clipboard. Then, the next time you press the right mouse button inside the Putty window, the text is pasted into the window. This shortcut can be quite useful — once you figure out what is going on.My host supports SSH1 and not SSH2. How do I tell Putty that?
SSH options are found under the Connection-SSH item on the left side of your screen. Click on SSH, then choose protocol version 1 or 2, depending on which your host uses (ACS supports both). You may need to ask your system administrator about the SSH settings your host prefers.
Use PuTTY as an SSH Client on WINDOWS:
User-------> PuTTY.exe-------------->Unix system
PuTTY.exe(Acts as the intermediary and used a secure shell (SSH) to connect to the remote computer i.e UNIX or LINUX system)
The SSH protocol was developed as a secure, encrypted replacement for the RSH protocol. RSH is used for remote shell access to a UNIX (or UNIX-like) system and was once popular among sysadmins before network security became the constant concern it is now. Now, thanks to SSH, the same convenience can be had with an encrypted protocol famous for its versatility and strong security.
PuTTY is likely the most used SSH client for the Microsoft Windows platform.
PuTTY’s basic capabilities:
Like OpenSSH, PuTTY is a very versatile tool for remote access to another computer. It’s probably used more often by people who want secure remote shell access to a UNIX or Linux system than for any other purpose, though that is only one of its many uses.
PuTTY is more than just an SSH client. It supports all of the following protocols:- raw: The raw protocol is normally used for network debugging.
- rlogin: This is an unencrypted UNIX remote login protocol that uses port 513 by default.
- serial: The serial option is used to connect to a serial line. The most common purpose for this is to establish a serial connection between computers in lieu of an Ethernet or other network connection.
- SSH: As already noted, SSH is an encrypted secure remote login protocol, which uses port 22 by default.
- Telnet: Like rlogin, Telnet (telecommunication network) is an unencrypted remote login protocol. It typically uses port 23 and is available on many systems other than UNIX. Like rlogin, Telnet has waned in popularity due to privacy concerns.
No comments:
Post a Comment